
This tutorial will show you how to install Google search support in Ubuntu terminal .This tutorial is useful for Newbies. In Ubuntu environment most of the installation is done through terminal & during installation sometimes we may get error
Tips_Tricks Archive
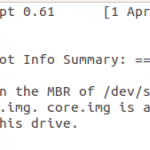
This tutorial will show you how to find where GRUB is installed in Ubuntu . For newbies , GRUB is nothing but a boot loader from GNU project . GRUB stands for GNU Grand Unified Bootloader . It provides the choice to boot one of multiple operating systems installed on computer. During installation of new GRUB , It’s very important to know in which partition the GRUB is installed . Open your terminal by pressing CTRL + ALT + T and run the following command to download the script. wget http://downloads.sourceforge.net/project/bootinfoscript/bootinfoscript/0.61/bootinfoscript-061.tar.gz You can also download and extract manually through below link [&hellip
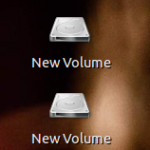
Whenever we insert the USB or use any drive in the Ubuntu, by default Mounted volumes are displayed in the desktop . Sometimes its annoying for users who have desktop full of icons . So in this tutorial , we will see how to hide the Mounted volumes on the desktop in the Ubuntu . To Hide Mounted Volume in the Desktop: Go to terminal and run the following commands gsettings set org.gnome.nautilus.desktop volumes-visible false To Show Mounted Volume in the desktop / To Revert the changes : Open the terminal and run the following command: gsettings set org.gnome.nautilus.desktop [&hellip
This tutorial will show you how to move the Maximize, Minimize button by default which is in left of the window to the right side in Ubuntu 11.10 . If you are newbie to Ubuntu and a Windows user , then it would be very difficult for you to get adjusted in the new environment .One of the problem newbie faces in the Ubuntu is when the user closes the window . In Windows , its in right position and it would be difficult to switch from right position to left . To Move Maximize , Minimize button to the [&hellip
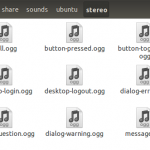
This Tutorial will explain how to change start up sound in Ubuntu . The format used in Ubuntu for startup sound is .OGG, so you have to convert music files into OGG before you set it as start up sound in Ubuntu . There are many converters available in market , so you can opt any converter.I have mobile Media converter to convert it into .OGG format. See also : How to : Install Mobile Media Converter in Ubuntu 11.10 Next step is to copy the converted OGG and paste into Ubuntu sound folder .To do that , enter following [&hellip
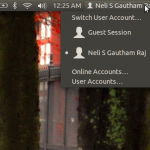
By default , the Guest session is enabled in Ubuntu 11.10 . This tutorial will show you how to remove the Guest session from the logon screen in Ubuntu 11.10.It is not imperative to do ,but its good to remove guest session to maintain privacy . Step 1: Go to terminal and run the following command to edit lightdm configuration file. sudo gedit /etc/lightdm/lightdm.conf Step 2 : Add the following line at the bottom. allow-guest=false Step 3: Restart the system
Previously , you can create desktop icon in Ubuntu by using “Create Launcher” option which was available when you right-click on desktop . But now in current versions like Ubuntu 11.04/11.10 you cannot create desktop icon in that same manner . In Ubuntu 11.04/ Ubuntu 11.10 , you have to install package to create desktop icon . First of all , Install Package through terminal . sudo apt-get install –no-install-recommends gnome-panel If done , Create your first desktop icon through following command. gnome-desktop-item-edit –create-new ~/Desktop That’s it done !!
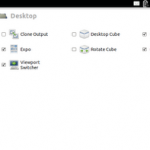
This is simple and useful tip for Ubuntu 11.10 users. By default , Autohide option is enabled in Unity & there is no option to disable it . This tutorial describes the steps needed to disable Autohide option in Ubuntu 11.10. Step 1 : Install CompizConfig Settings Manager . It can be done through terminal . Open the terminal and run the following command . sudo apt-get install compizconfig-settings-manager Step 2 : Go to CompizConfig Settings Manager , Navigate through Desktop ->Ubuntu Unity Plugin . Click Ubuntu Unity plugin , here you can see “Hide Launcher” for which Dodge windows is set by default. [&hellip
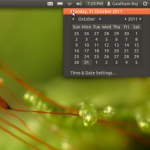
This tutorial will show you how to display multiple time zone in Ubuntu 11.10 . By default it comes with calendar ,but you can customize in your own way. Step 1 : Go to top panel and Navigate through Clock -> Time and date settings . Step 2 : Next you have to disable “Monthly calendar” which is enabled by default in Ubuntu 11.10 , but at the same time you have to enable “Time in other locations” option which is disabled by default. Before (Which comes by default) : After Our change : Step 3 : Select “Choose location” [&hellip
Whenever we use the sudo command , the password is saved for 15 mins by default . But we can change the time by using simple method . Step 1 : Go to terminal and run the following command sudo visudo Step 2 : Now search the below line . defaults env_reset change the above line into Defaults env_reset , timestamp_timeout=x where x is the remembering time. Press Ctrl + x to save . You may also like : How to : Install New Lock Dialog Theme on Ubuntu 10.04 /9.10 Wammu – Mobile Phone Manager for Linux How to:Sync [&hellip
- 1
- 2